Christmas Kitchen Sink Cookies-Best Recipe
Christmas Kitchen Sink Cookies are more than just a holiday treat; they’re a delightful explosion of festive flavors and textures that capture the very spirit of the season. Imagin extracte a warm, chewy cookie brimming with all the best bits and bobs you might find lurking in your pantry during December – a true testament to spontaneous holiday baking at its finest. What is it about these cookies that makes them so universally adored? It’s the joyous freedom they represent. Unlike meticulously planned pastries, these allow you to raid your cupboards and combine your favorite sweet and salty components into one glorious creation. They are inherently personal, a reflection of individual taste, making each batch of Christmas Kitchen Sink Cookies wonderfully unique and packed with nostalgic charm. Get ready to fill your kitchen with irresistible aromas and create a masterpiece that’s as fun to make as it is to devour!
Ingredients:
- 3/4 cup salted butter, softened
- 3/4 cup light brown sugar, packed
- 1/4 cup granulated white sugar
- 2 egg yolks, at room temperature
- 2 tsp vanilla bean paste or extract
- 1 1/2 cups all-purpose flour, spooned and leveled
- 1/2 tsp baking powder
- 1/2 tsp baking soda
- 1/2 tsp salt
- 1/2 cup red and green M&M's
- 1/3 cup white chocolate chips
- 1/3 cup pretzel pieces
- 1/3 cup potato chip pieces
- 2 tbsp red and green jimmies
Creaming the Butter and Sugars
Let’s start by creating a beautiful, fluffy base for our Christmas Kitchen Sink Cookies. In a large mixing bowl, or the bowl of your stand mixer fitted with the paddle attachment, cream together the softened salted butter, light brown sugar, and granulated white sugar. It’s important that your butter is truly softened – not melted, but yielding to the touch. This will allow it to incorporate air effectively. Beat these ingredients on medium-high speed for about 3-4 minutes, or until the mixture is light and fluffy, almost pnon-alcoholic ale yellow in color. Scrape down the sides of the bowl occasionally to ensure everything is evenly combined. This step is crucial for achieving a tender cookie texture.
Incorporating Wet Ingredients
Now it’s time to add the richness and flavor. To the creamed butter and sugar mixture, add the two egg yolks, one at a time, beating well after each addition until fully incorporated. Using egg yolks instead of whole eggs contributes to a chewier cookie, which is a fantastic characteristic for a kitchen sink cookie. Next, stir in the vanilla bean paste or extract. If you’re using vanilla bean paste, you’ll see those lovely specks of vanilla throughout your dough, which not only looks beautiful but also adds an intense vanilla flavor. Continue to beat on medium speed until everything is well combined and smooth.
Combining Dry Ingredients
In a separate medium bowl, whisk together the all-purpose flour, baking powder, baking soda, and salt. Whisking these dry ingredients together ensures that the leavening agents and salt are evenly distributed throughout the flour, which helps the cookies bake evenly and prevents pockets of saltiness. I like to spoon my flour into the measuring cup and then level it off with a straight edge, like the back of a knife. This method prevents over-measuring the flour, which can lead to tough cookies.
Bringin extractg Dough Together
Gradually add the dry ingredients to the wet ingredients. Mix on low speed until just combined. Be careful not to overmix the dough at this stage, as overmixing can develop the gluten in the flour, resulting in a tough cookie. We’re looking for a dough that just comes together, with no visible streaks of flour. Once the dough has almost fully come together, it’s time for the fun part – adding all the delicious mix-ins that make these Christmas Kitchen Sink Cookies so special!
Adding the “Kitchen Sink” Goodies
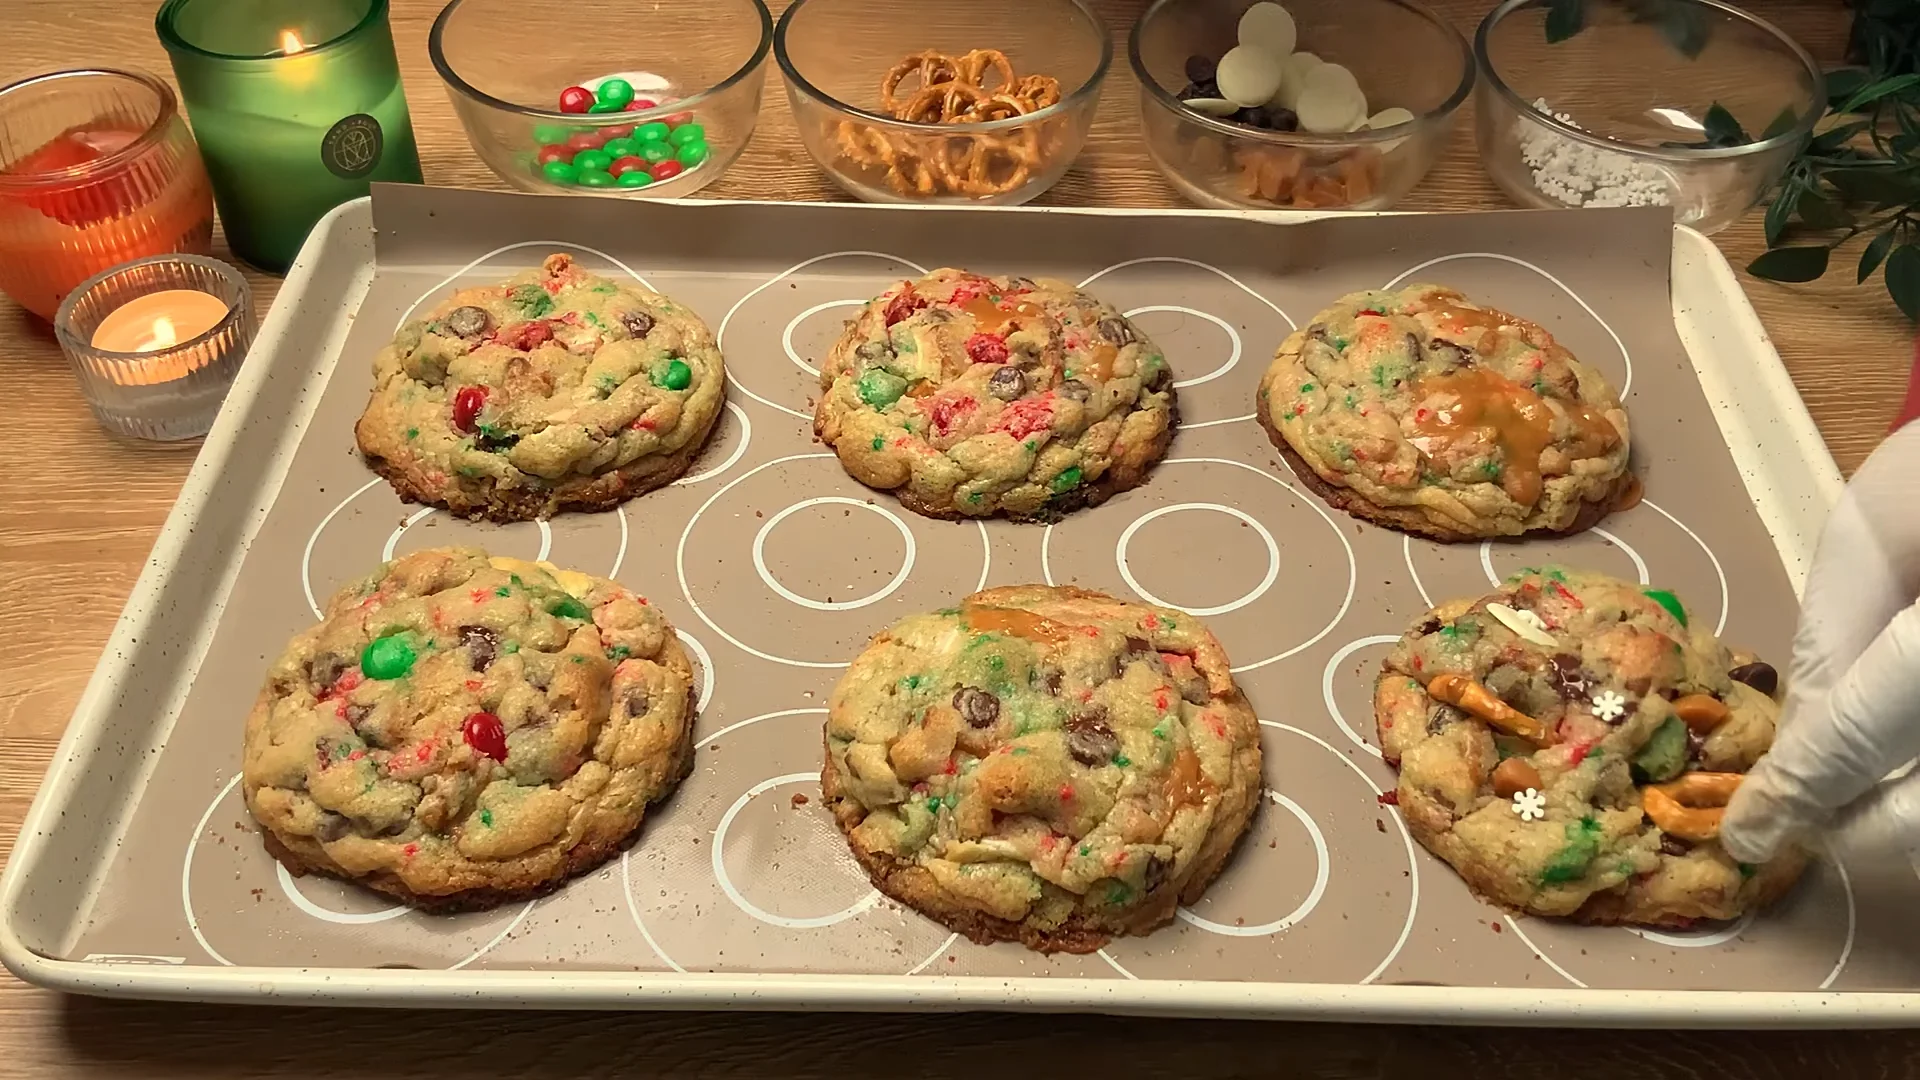
This is where the magic happens! Gently fold in the red and green M&M’s, white chocolate chips, pretzel pieces, and potato chip pieces using a sturdy spatula or spoon. You want to distribute these goodies as evenly as possible throughout the dough. The combination of sweet and salty, crunchy and melty is what makes this cookie a true delight. Finally, sprinkle in the red and green jimmies and give the dough a few more gentle folds to incorporate them. The jimmies will add a festive sparkle and a touch of extra sweetness.
Baking the Christmas Kitchen Sink Cookies
Preheat your oven to 350°F (175°C). Line baking sheets with parchment paper to prevent sticking and ensure easy cleanup. Drop rounded tablespoons of dough onto the prepared baking sheets, leaving about 2 inches between each cookie to allow for spreading. For larger cookies, you can use a cookie scoop, which helps ensure uniform size. If you like your cookies a little flatter, you can gently press down on the tops of the dough balls with your palm or the bottom of a glass. Bake for 9-12 minutes, or until the edges are golden brown and the centers are set but still slightly soft. Keep an eye on them as oven temperatures can vary. For the chewiest results, it’s best not to overbake. Let the cookies cool on the baking sheets for a few minutes before transferring them to a wire rack to cool completely.

Conclusion:
And there you have it – your guide to creating the most delightful Christmas Kitchen Sink Cookies! We’ve walked through every step, from gathering those wonderfully chaotic ingredients to the final bake that fills your home with that irresistible holiday aroma. These cookies are more than just a treat; they’re a celebration in every bite, perfect for sharing with loved ones or simply enjoying yourself during the festive season.
When it comes to serving, these Christmas Kitchen Sink Cookies are incredibly versatile. They’re fantastic on their own, of course, but imagin extracte them alongside a warm mug of spiced apple cider or a rich hot chocolate. They also make for a charming addition to any holiday cookie platter or a thoughtful homemade gift for neighbours and friends.
Don’t be afraid to get creative with variations! Feeling adventurous? Try adding a pinch of peppermint extract to the dough, or perhaps some white chocolate chips for a snowy effect. Chopped nuts like pecans or walnuts also add a lovely texture and flavour. The beauty of the “kitchen sink” concept is its adaptability – make it your own! I encourage you to embrace the spirit of the season and have fun baking these.
Frequently Asked Questions about Christmas Kitchen Sink Cookies:
Can I make these cookies ahead of time?
Absolutely! The dough for Christmas Kitchen Sink Cookies can be made a day or two in advance and stored in the refrigerator. You can also bake the cookies and then store them in an airtight container at room temperature for up to a week. This makes them perfect for busy holiday schedules.
What kind of “sink” ingredients work best?
The beauty of these Christmas Kitchen Sink Cookies is their flexibility! Beyond the core ingredients, think about classic holiday flavours. Good additions include: chopped candy canes, dried cranberries, various holiday-themed sprinkles, white chocolate chips, dark chocolate chunks, and even a tgin extracth of gingerbread spice for an extra festive kick. Aim for a balance of sweet, salty, and textural elements.
Christmas Kitchen Sink Cookies-Best Recipe
Delicious and festive Christmas Kitchen Sink Cookies packed with sweet and salty goodies for a delightful holiday treat.
Ingredients
-
3/4 cup salted butter, softened
-
3/4 cup light brown sugar, packed
-
1/4 cup granulated white sugar
-
2 egg yolks, at room temperature
-
2 tsp vanilla bean paste or extract
-
1 1/2 cups all-purpose flour, spooned and leveled
-
1/2 tsp baking powder
-
1/2 tsp baking soda
-
1/2 tsp salt
-
1/2 cup red and green M&M’s
-
1/3 cup white chocolate chips
-
1/3 cup pretzel pieces
-
1/3 cup potato chip pieces
-
2 tbsp red and green jimmies
Instructions
-
Step 1
Cream together softened butter and both sugars in a large bowl until light and fluffy, about 3-4 minutes. Scrape down the sides of the bowl as needed. -
Step 2
Add egg yolks one at a time, beating well after each addition. Stir in vanilla bean paste or extract until well combined. -
Step 3
In a separate bowl, whisk together flour, baking powder, baking soda, and salt. Spoon and level flour to avoid over-measuring. -
Step 4
Gradually add the dry ingredients to the wet ingredients, mixing on low speed until just combined. Do not overmix. -
Step 5
Gently fold in M&M’s, white chocolate chips, pretzel pieces, and potato chip pieces. Finally, add red and green jimmies and fold a few more times. -
Step 6
Preheat oven to 350°F (175°C). Line baking sheets with parchment paper. Drop rounded tablespoons of dough onto the sheets, about 2 inches apart. -
Step 7
Bake for 9-12 minutes, or until edges are golden brown and centers are set but slightly soft. Cool on baking sheets for a few minutes before transferring to a wire rack to cool completely.
Important Information
Nutrition Facts (Per Serving)
It is important to consider this information as approximate and not to use it as definitive health advice.
Allergy Information
Please check ingredients for potential allergens and consult a health professional if in doubt.