Strawberry Kiss Cookies – Sweet & Easy Dessert Recipe
Strawberry Kiss Cookies are more than just a sweet treat; they are a burst of pure joy, a tender hug in cookie form, and a nostalgic trip back to simpler times. Have you ever taken a bite of something so perfectly balanced, so delightfully delicate, that it simply made your day better? That’s the magic of these Strawberry Kiss Cookies. People adore them for their irresistibly light and crum extractbly texture, their subtle yet distinct strawberry flavor that’s never overpowering, and of course, their charming appearance that’s almost too pretty to eat. What truly sets these Strawberry Kiss Cookies apart is the delicate, melt-in-your-mouth quality achieved through a specific baking technique that ensures a tender bite every single time. They’re perfect for sharing, for celebrating, or simply for indulgin extractg in a moment of sweet serenity.
Ingredients:
- 1 box (15.25 oz) strawberry cake mix
- 8 tablespoons (1/2 cup) butter, melted and slightly cooled
- 1 large egg
- 4 ounces cream cheese, softened
- Optional: powdered sugar or pink granulated sugar for dusting
- 30 chocolate Hershey’s Kisses, unwrapped
Strawberry Kiss Cookie Dough Preparation
Mixing the Dough
The foundation of these delightful Strawberry Kiss Cookies lies in a simple yet effective dough. To begin extract, preheat your oven to 350 degrees Fahrenheit (175 degrees Celsius). Line two baking sheets with parchment paper. This step is crucial for preventing the cookies from sticking and ensuring easy cleanup. In a large mixing bowl, combine the contents of the strawberry cake mix box. Pour in the melted and slightly cooled butter. It’s important that the butter isn’t piping hot when you add it, as this can sometimes affect the texture of the cake mix.
Next, crack in the large egg. Now comes the cream cheese. Make sure your cream cheese has softened to room temperature. This usually takes about 30-60 minutes on the counter, or you can gently soften it in the microwave for a few seconds at a time, being careful not to melt it completely. Softened cream cheese incorporates much more smoothly into the dough, preventing any lumps and contributing to a wonderfully tender cookie.
Achieving the Perfect Dough Consistency
Using a sturdy spoon or a rubber spagin extracta, begin to mix the ingredients. Continue mixing until everything is just combined and a thick, dough-like consistency forms. You’re not looking for a batter here; it should be firm enough to handle. If the dough seems a little too dry and crum extractbly, you can add a teaspoon of milk or water at a time, mixing thoroughly after each addition, until it just comes together. Conversely, if it seems too sticky, you can add a tablespoon of the cake mix. Don’t overmix, as this can lead to tough cookies. The goal is a cohesive dough that you can easily roll into balls.
Forming and Baking the Cookies
Shaping the Cookies
Once your dough is ready, it’s time to start forming the cookie balls. I find it easiest to use a small cookie scoop or a tablespoon to portion out the dough. Roll each portion into a smooth ball, about 1 inch in diameter. Place these dough balls onto your prepared baking sheets, leaving about 2 inches of space between each one. This allows for them to spread as they bake.
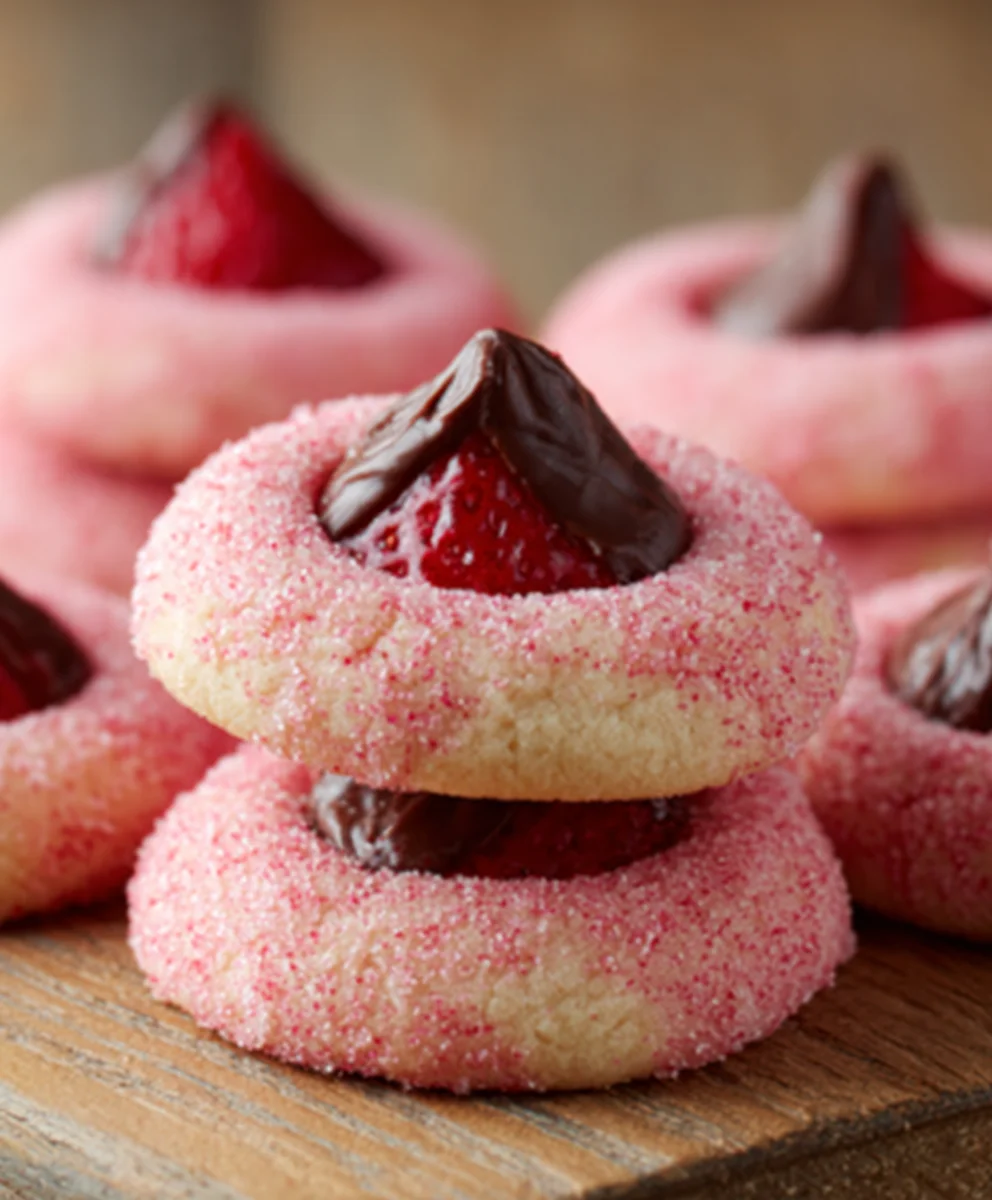
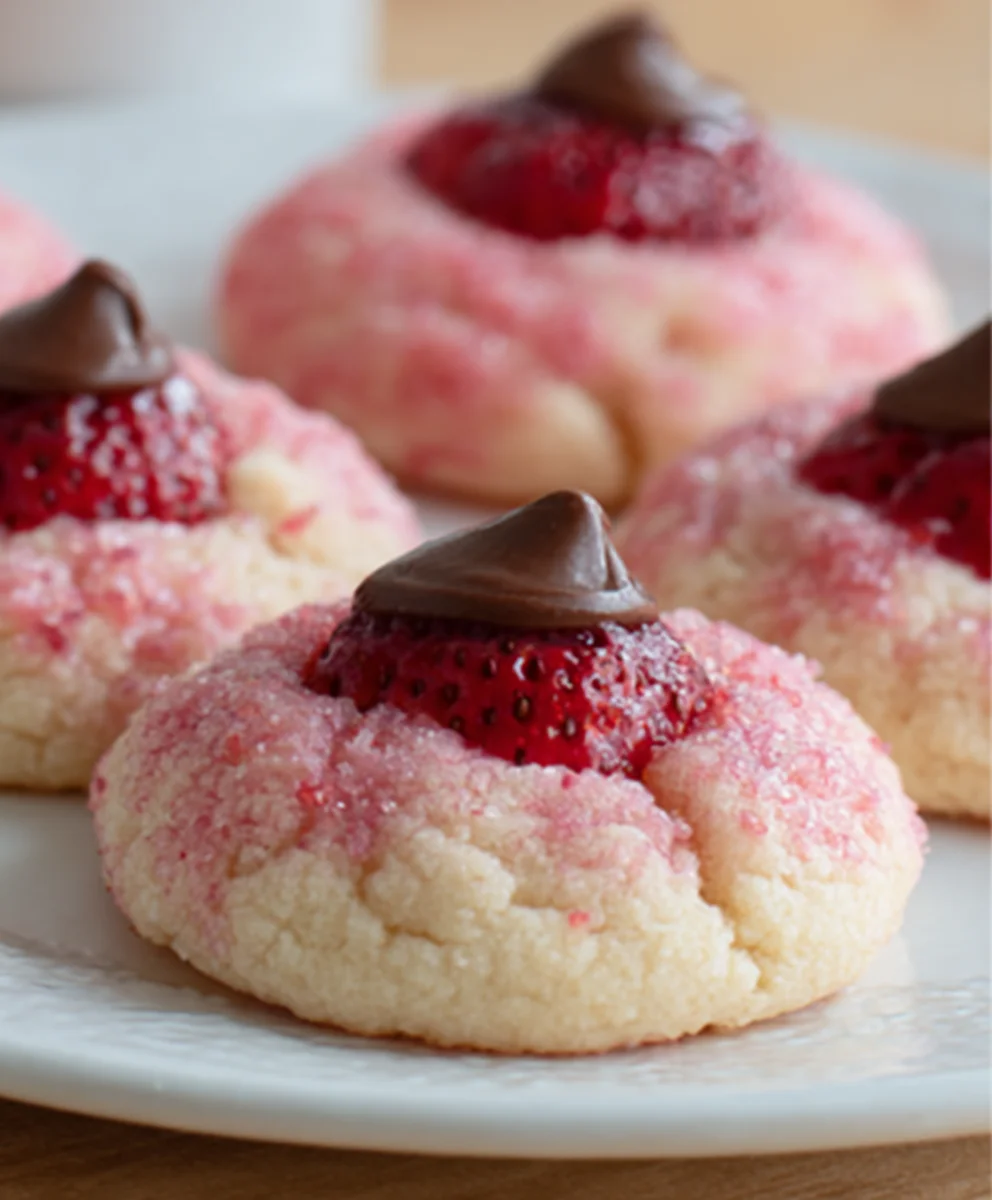
Now, for the signature touch: the Hershey’s Kiss. Gently press one unwrapped chocolate Hershey’s Kiss into the center of each dough ball. The warmth of the dough will help it slightly embed. You want the pointy end of the Kiss to be facing upwards. Don’t worry if the dough cracks a little around the Kiss; that’s perfectly normal and adds to the rustic charm of these cookies.
Baking for the Perfect Texture
Place the baking sheets into your preheated oven. Bake for 9 to 11 minutes. The exact baking time will depend on your oven and the size of your cookies. You’re looking for the edges of the cookies to be set and lightly golden, but the centers should still appear slightly soft. They will continue to cook and firm up as they cool on the baking sheet. It’s better to slightly underbake these cookies than to overbake them, as the goal is a soft, chewy texture.
Cooling and Finishing Touches
Cooling Down
After the baking time is complete, remove the baking sheets from the oven. Let the cookies cool on the baking sheets for about 5 minutes. During this time, the Hershey’s Kisses will have melted beautifully into the warm dough, creating a lovely chocolate pool on top of the strawberry cookie. This resting period is important; it allows the cookies to set up enough so they don’t fall apart when you move them.
Optional Finishing Touches
Once the 5 minutes of cooling on the baking sheet are up, carefully transfer the Strawberry Kiss Cookies to a wire rack to cool completely. While they are still warm, or after they have cooled, you can add an optional dusting of powdered sugar for a snowy effect, or a sprinkle of pink granulated sugar to enhance the festive strawberry theme. This step is entirely up to your preference, but it does add a lovely visual appeal. These cookies are best enjoyed at room temperature, when the chocolate is slightly softened and the cookie is wonderfully chewy.
Conclusion:
And there you have it – the delightful and surprisingly simple process for creating your very own batch of Strawberry Kiss Cookies! We’ve walked through each step, from creaming the butter and sugar to the delicate folding of the strawberry jam, ensuring you can achieve those beautiful swirls and that perfect soft, chewy texture. These Strawberry Kiss Cookies are a true testament to how a few simple ingredients can come together to create something truly special. They are perfect for any occasion, whether it’s a weekend treat, a bake snon-alcoholic ale contribution, or a heartfelt homemade gift. I truly encourage you to give this recipe a try; you might just find it becomes a new family favorite!
For serving, these cookies are absolutely wonderful on their own, but they also pair beautifully with a glass of cold milk, a cup of tea, or even a scoop of vanilla ice cream. Consider them for a delightful afternoon pick-me-up or as a charming addition to any dessert spread. If you’re feeling adventurous, try swirling in a few drops of red food coloring with the jam for an even more vibrant hue, or perhaps a touch of almond extract in the cookie dough for a subtle flavor enhancement. The possibilities are endless!
Frequently Asked Questions about Strawberry Kiss Cookies:
Q1: My jam is leaking out during baking, what can I do?
A: Ensure you are using a thicker jam or preserve. If your jam is quite runny, you can try thickening it slightly by simmering it with a teaspoon of cornstarch before cooling and using it. Also, make sure you’re not overfilling the center pocket of the cookie dough with jam.
Q2: Can I make these cookies ahead of time?
A: Absolutely! Baked and cooled Strawberry Kiss Cookies can be stored in an airtight container at room temperature for up to 3-4 days. They might even get chewier and more delicious over time!
Q3: I don’t have fresh strawberries for jam, can I use store-bought?
A: Yes, you can definitely use good quality store-bought strawberry jam or preserves. Just ensure it’s a variety without large chunks if you prefer a smoother swirl within your cookies.
Strawberry Kiss Cookies – Sweet & Easy Dessert Recipe
A simple and delightful recipe for strawberry cookies with a chocolate kiss center, perfect for any occasion.
Ingredients
-
1 box (15.25 oz) strawberry cake mix
-
8 tablespoons (1/2 cup) butter, melted and slightly cooled
-
1 large egg
-
4 ounces cream cheese, softened
-
30 chocolate Hershey’s Kisses, unwrapped
-
Optional: powdered sugar or pink granulated sugar for dusting
Instructions
-
Step 1
Preheat oven to 350°F (175°C). Line two baking sheets with parchment paper. -
Step 2
In a large bowl, combine strawberry cake mix, melted butter, egg, and softened cream cheese. Mix until a thick, dough-like consistency forms. -
Step 3
Roll dough into 1-inch balls and place on prepared baking sheets, leaving 2 inches between cookies. -
Step 4
Gently press one unwrapped chocolate Hershey’s Kiss into the center of each dough ball. -
Step 5
Bake for 9 to 11 minutes, or until edges are set and lightly golden, but centers are still soft. -
Step 6
Let cookies cool on baking sheets for 5 minutes before transferring to a wire rack to cool completely. -
Step 7
Optionally dust with powdered sugar or pink granulated sugar once cooled.
Important Information
Nutrition Facts (Per Serving)
It is important to consider this information as approximate and not to use it as definitive health advice.
Allergy Information
Please check ingredients for potential allergens and consult a health professional if in doubt.