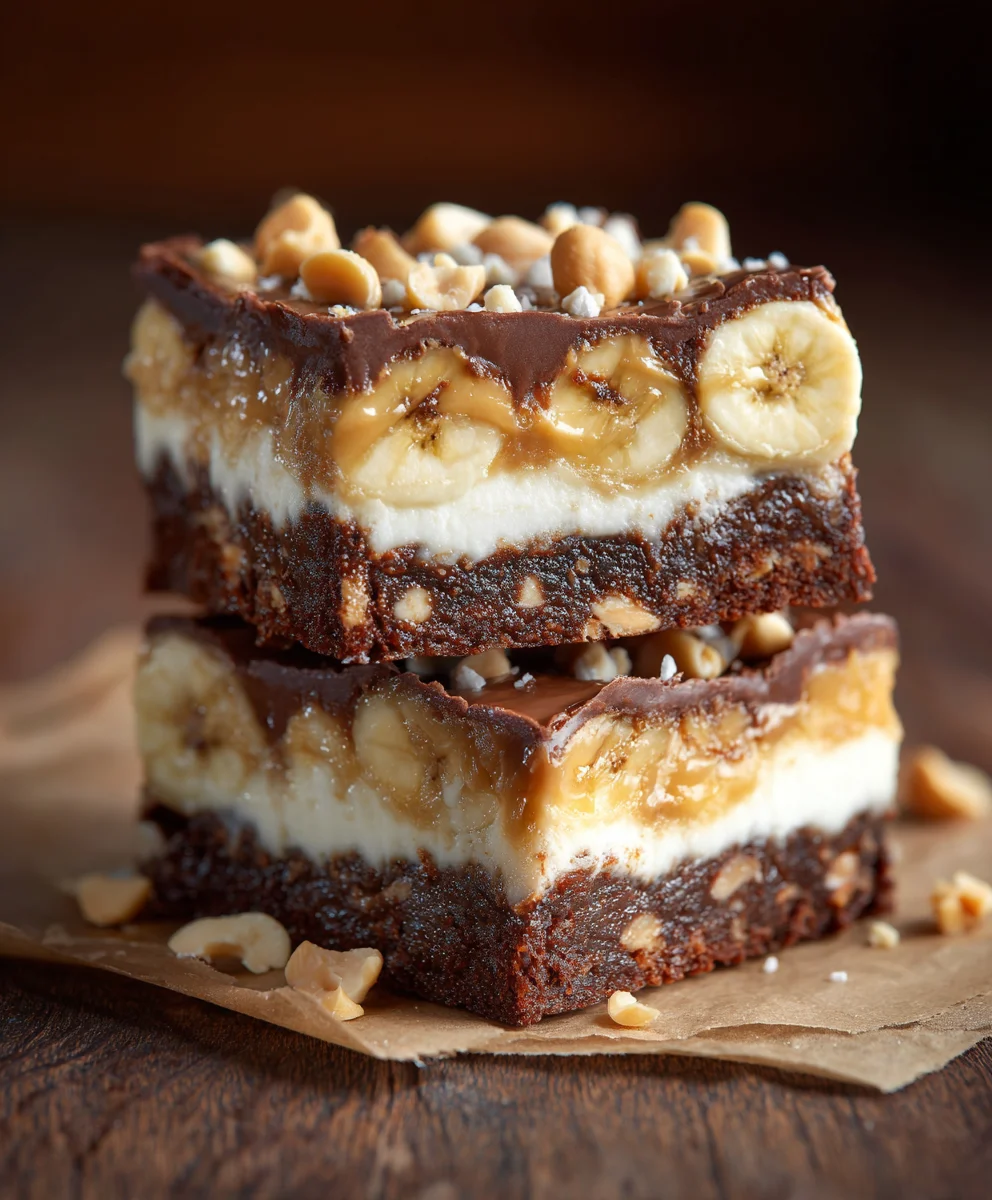
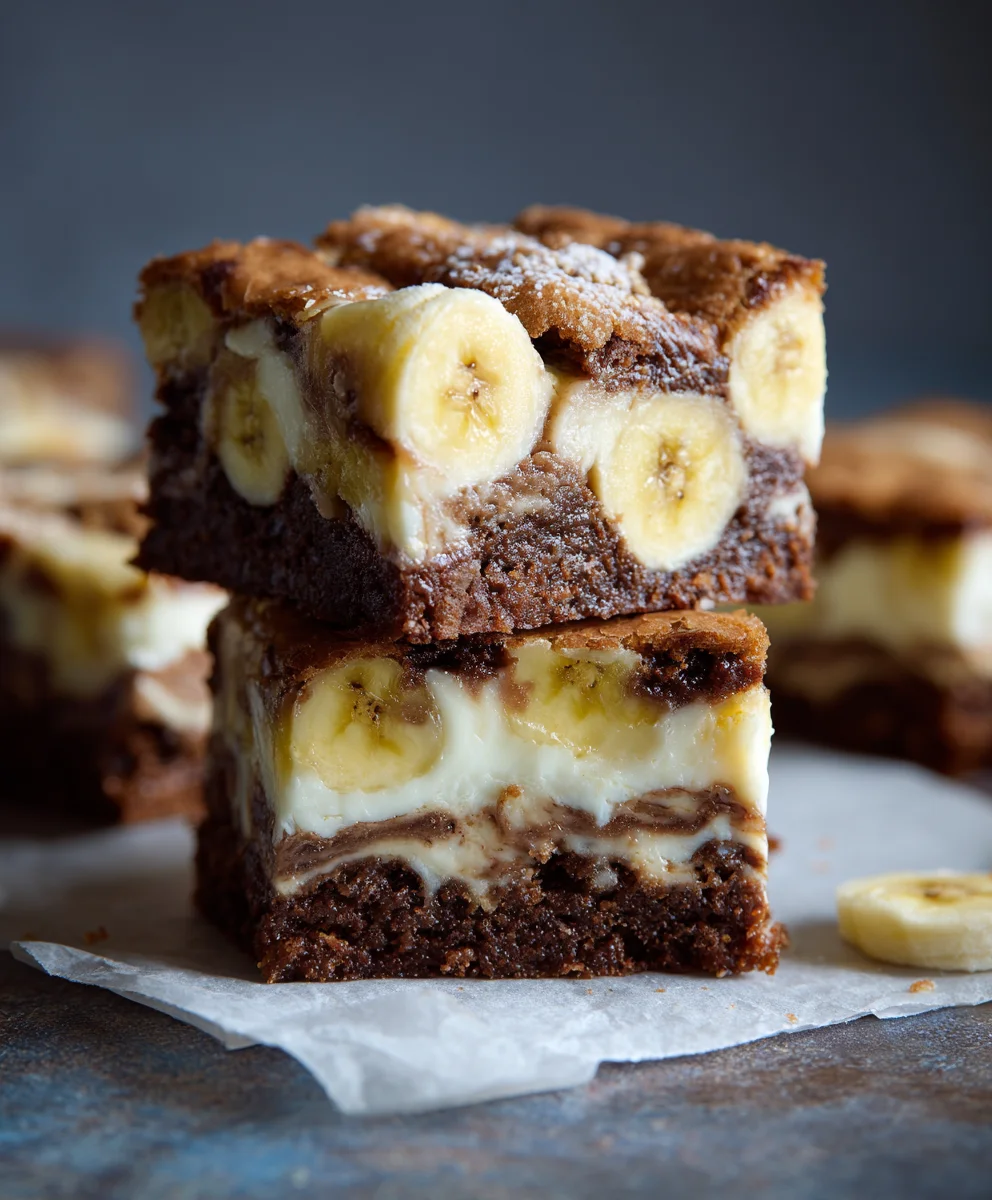
Banana Pudding Brownies-Decadent & Easy Recipe
Banana Pudding Brownies are not just a dessert; they’re an experience. Imagin extracte the rich, fudgy depth of a classic brownie colliding with the creamy, comforting embrace of banana pudding, all baked into one glorious treat. This is the ultimate convergence of two beloved classics, creating a dessert that is both familiar and excitingly new. People adore this creation because it delivers on all fronts: the intense chocolatey satisfaction of a brownie, the subtle sweetness and smooth texture of ripe bananas, and the delightful, slightly custardy notes of a well-made pudding. What truly makes Banana Pudding Brownies special is the ingenious layering of flavors and textures. You get that satisfying crackle on top of the brownie, followed by a dense, chewy interior, all punctuated by pockets of sweet, caramelized banana and a hint of vanilla that whispers of nostalgic pudding. It’s a sophisticated yet utterly approachable indulgence that promises pure bliss with every single bite.
Ingredients:
- 1 box brownie mix (plus any additional ingredients like eggs, oil, and water as specified on the brownie mix box for a 9×13 pan)
- 1 (3.4 oz) box instant banana pudding mix
- 1½ cups cold milk
- 1 tsp vanilla extract
- 1½–2 cups whipped topping (such as Cool Whip), thawed if frozen, or homemade whipped cream
- 1–1½ cups crushed vanilla wafers
- Fresh banana slices (optional, for garnish)
Preparing the Brownie Base
Let’s start by creating the foundation for our delightful Banana Pudding Brownies: the rich, chocolatey brownie layer. Preheat your oven according to the directions on your brownie mix box, typically around 350°F (175°C). If you’re using a homemade brownie recipe, follow those specific preheating instructions. Grease and flour a 9×13 inch baking pan, or line it with parchment paper for easier removal. This step is crucial to prevent sticking and ensure your brownies come out beautifully. In a medium bowl, combine the brownie mix with the eggs, oil, and water as directed on the box. Mix until just combined – be careful not to overmix, as this can lead to tough brownies. The batter should be thick and fudgy. Pour the batter evenly into the prepared baking pan, spreading it with a spatula to ensure it reaches all the corners. We want a consistent layer for our pudding to sit on. Once your brownie batter is spread, it’s time to bake. Refer to your brownie mix box for the suggested baking time, usually around 25-35 minutes. You’ll know they’re ready when a toothpick inserted into the center comes out with moist crum extractbs attached, but not wet batter. Once baked, remove the brownies from the oven and let them cool completely in the pan on a wire rack. This cooling period is essential; you don’t want to add the pudding layer to hot brownies, as it will melt and create a mess.
Crafting the Creamy Banana Pudding Layer
While our brownie base is cooling, let’s move on to the star of the show – the luscious banana pudding layer. In a large bowl, combine the contents of the instant banana pudding mix with the 1½ cups of cold milk. It’s important to use cold milk as it helps the pudding thicken properly and achieve the correct consistency. Add the 1 teaspoon of vanilla extract to the mixture. Vanilla extract enhances the overall flavor profile and complements the banana beautifully. Using a whisk, beat the pudding mixture vigorously for about 2 minutes, or until it begin extracts to thicken. Instant pudding is designed to set up quickly, so don’t be alarmed if it starts to firm up as you whisk. Once it’s thickened to a pudding-like consistency, set it aside. Allow it to sit for about 5 minutes to fully set before proceeding. This brief resting period ensures a stable pudding layer that won’t seep into the brownies.
Assembling the Banana Pudding Brownies
Now for the exciting pagin extract bringing all our delicious components together! Once the brownie layer has cooled completely in the pan, it’s time to add the pudding. Gently pour the thickened banana pudding mixture over the cooled brownie base. Use a spatula to spread the pudding evenly across the entire surface of the brownies, making sure to get a nice, even layer right to the edges. Take your time with this step to ensure a uniform pudding topping. You want every bite to have a delightful ratio of brownie and pudding. Smooth out the surface as much as possible for a clean finish.
Adding the Sweet Topping
To complete the trifecta of textures and flavors, we’ll add a light and airy topping. Spoon the thawed whipped topping (or your homemade whipped cream) over the banana pudding layer. Spread it gently and evenly across the top, creating a fluffy cloud. You can opt for a smooth finish or create some swirls and peaks for visual appeal. This whipped topping adds a wonderful lightness that contrasts beautifully with the dense brownie and creamy pudding. It also provides a sweet, mellow base for the crunchy vanilla wafers.
The Final Flourish: Crushed Vanilla Wafers and Optional Garnish
The final touch that truly elevates these Banana Pudding Brownies is the crunchy element. Sprinkle the crushed vanilla wafers generously over the whipped topping. Ensure an even distribution so you get that satisfying crunch in every bite. You can crush the vanilla wafers by placing them in a zip-top bag and gently hitting them with a rolling pin, or by pulsing them in a food processor. Don’t crush them too finely; you want some small chunks for texture. If you’re feeling extra fancy or want to enhance the banana flavor, arrange fresh banana slices on top of the crushed wafers. This is purely optional, but it adds a lovely visual touch and a fresh burst of banana flavor. Once assembled, cover the pan tightly with plastic wrap. It’s best to refrigerate the Banana Pudding Brownies for at least 2-3 hours, or even overnight. This chilling time is crucial for the flavors to meld together and for the layers to set up properly, making them easier to cut and enjoy. When ready to serve, cut into squares. You can use a sharp knife dipped in hot water for cleaner cuts, especially through the brownie layer.
Conclusion:
There you have it – a recipe for truly decadent Banana Pudding Brownies that are sure to become a new favorite! We’ve combined the rich, fudgy goodness of brownies with the creamy, comforting flavors of banana pudding, creating a dessert that’s both familiar and exciting. This recipe is surprisingly straightforward, offering a rewarding baking experience for home cooks of all levels. Imagin extracte biting into a moist brownie studded with soft banana pieces and topped with a luscious pudding layer, all finished with a sprinkle of crunchy wafers. It’s a symphony of textures and tastes that will have everyone asking for seconds!
For serving, these Banana Pudding Brownies are fantastic on their own, but consider pairing them with a dollop of whipped cream or a scoop of vanilla bean ice cream for an extra layer of indulgence. They also make a stunning dessert at potlucks or gatherings. If you’re feeling adventurous, try adding a swirl of caramel sauce over the pudding layer or incorporating chopped toasted pecans for added crunch and nutty flavor.
Don’t be afraid to experiment and make these Banana Pudding Brownies your own! We encourage you to give this recipe a try. We’re confident you’ll love the delightful fusion of flavors and textures. Happy baking!
Frequently Asked Questions:
Q: Can I make Banana Pudding Brownies ahead of time?
A: Absolutely! Banana Pudding Brownies can be made a day in advance. In fact, they often taste even better the next day as the flavors have a chance to meld. Store them tightly covered at room temperature or in the refrigerator. If refrigerating, allow them to come to room temperature for about 30 minutes before serving for the best texture.
Q: What kind of bananas should I use for Banana Pudding Brownies?
A: For the best flavor and texture, use ripe to overripe bananas. The riper the banana, the sweeter and more intensely flavored it will be, contributing beautifully to the overall taste of your Banana Pudding Brownies. Look for bananas with plenty of brown spots.
Banana Pudding Brownies-Decadent & Easy Recipe
A decadent and easy recipe for layered brownies featuring a rich chocolate base, creamy banana pudding, and a sweet whipped topping, finished with crushed vanilla wafers.
Ingredients
-
1 box brownie mix (plus eggs, oil, and water as specified on box)
-
1 (3.4 oz) box instant banana pudding mix
-
1½ cups cold milk
-
1 tsp vanilla extract
-
1½–2 cups whipped topping (such as Cool Whip), thawed
-
1–1½ cups crushed vanilla wafers
-
Fresh banana slices (optional, for garnish)
Instructions
-
Step 1
Preheat oven according to brownie mix directions (approx. 350°F/175°C). Grease and flour a 9×13 inch pan or line with parchment paper. Combine brownie mix with required wet ingredients, mix until just combined (do not overmix). Pour batter into prepared pan and spread evenly. Bake for 25-35 minutes, or until a toothpick inserted in the center comes out with moist crumbs. Let cool completely in the pan. -
Step 2
While brownies cool, prepare the pudding layer. In a large bowl, combine the instant banana pudding mix with cold milk and vanilla extract. Whisk vigorously for about 2 minutes until thickened. Let sit for 5 minutes to fully set. -
Step 3
Once the brownie base is completely cooled, gently pour the thickened banana pudding over it. Use a spatula to spread the pudding evenly across the entire surface of the brownies. -
Step 4
Spoon the thawed whipped topping over the banana pudding layer. Spread it gently and evenly across the top, creating a fluffy finish. -
Step 5
Sprinkle the crushed vanilla wafers generously over the whipped topping. Optionally, arrange fresh banana slices on top for garnish. Cover tightly with plastic wrap and refrigerate for at least 2-3 hours, or overnight, to allow flavors to meld and layers to set. -
Step 6
To serve, cut into squares. A sharp knife dipped in hot water can help create cleaner cuts.
Important Information
Nutrition Facts (Per Serving)
It is important to consider this information as approximate and not to use it as definitive health advice.
Allergy Information
Please check ingredients for potential allergens and consult a health professional if in doubt.