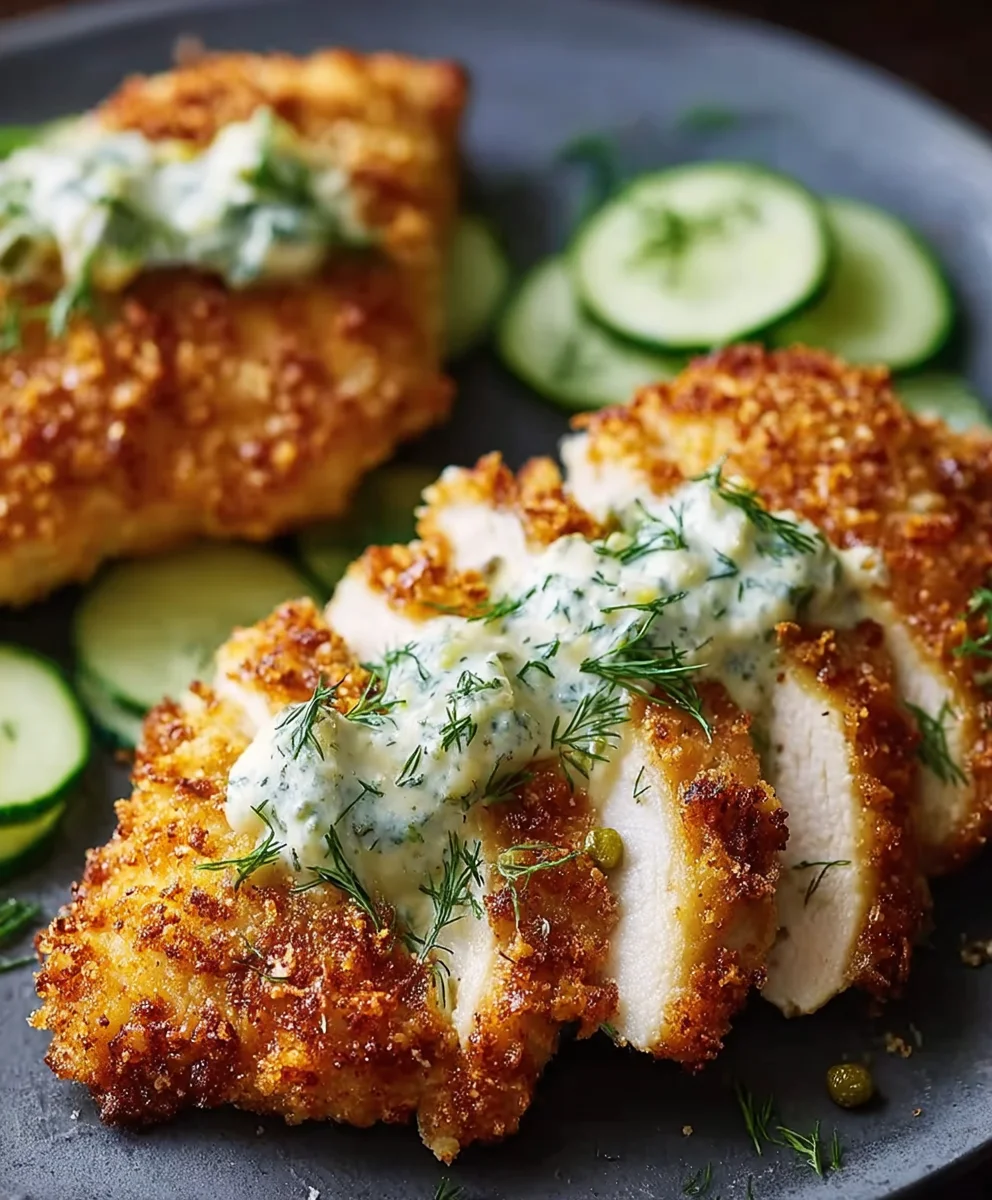
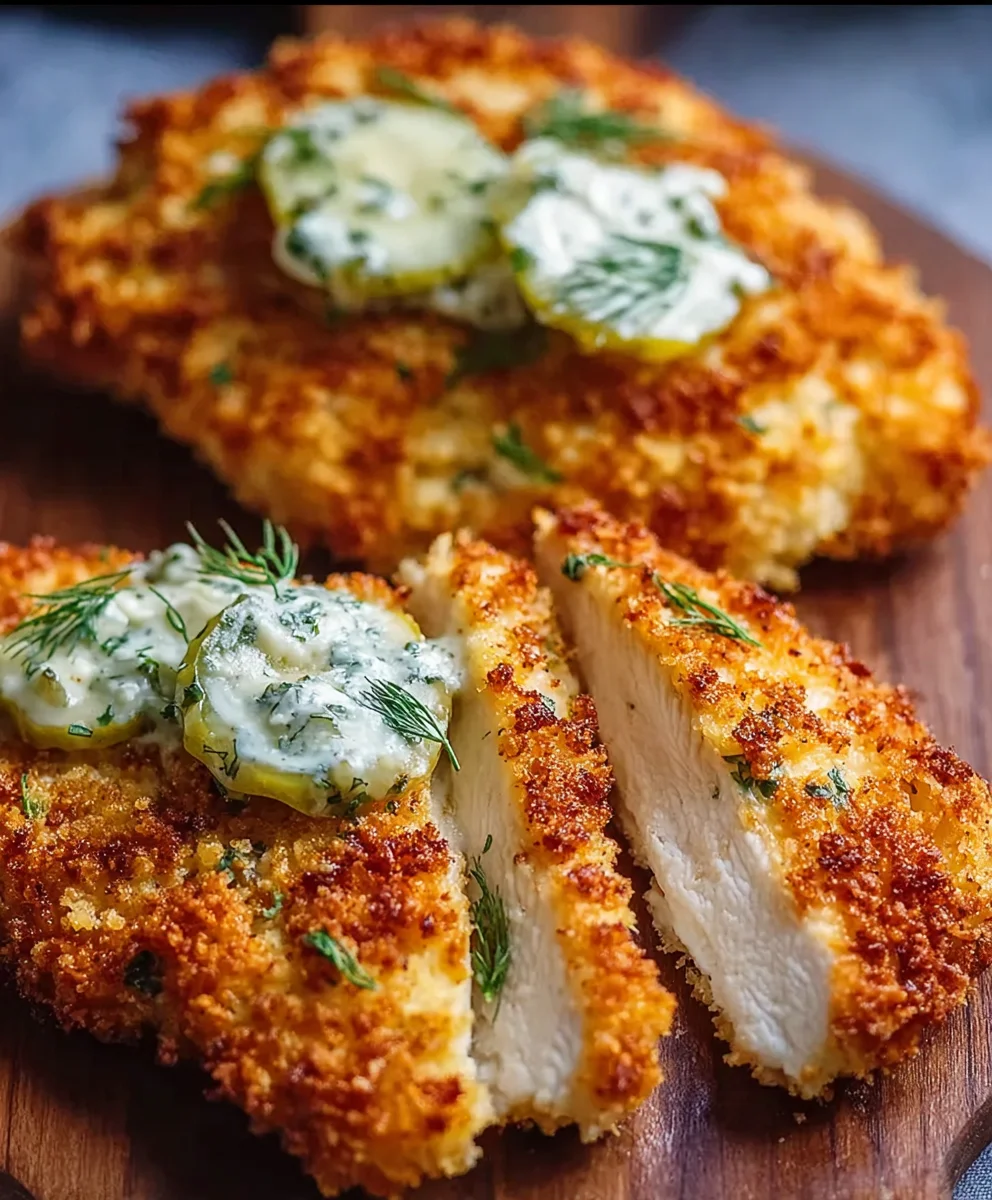
Crispy Dill Pickle Parmesan Chicken-Ultimate Recipe
The Best Crispy Dill Pickle Parmesan Chicken: An Amazing Ultimate Recipe that will revolutionize your weeknight dinners and impress your guests alike. Have you ever craved that perfect bite – a shatteringly crisp exterior giving way to juicy, tender chicken, all infused with the bold, tangy essence of dill pickles and the nutty richness of Parmesan cheese? Well, your culinary quest ends here! This isn’t just another chicken recipe; it’s an experience. People adore this dish because it masterfully balances savory, sour, and salty notes in a way that’s utterly addictive. The secret lies in the genius combination of crushed dill pickle chips and grated Parmesan cheese forming a truly unforgettable crust. Prepare to be amazed by how such simple ingredients can transform a humble chicken cutlet into an absolute showstopper. Get ready to make The Best Crispy Dill Pickle Parmesan Chicken: An Amazing Ultimate Recipe your new go-to comfort food.
Ingredients:
- 4 boneless, skinless chicken breasts
- 1 cup dill pickle juice (from a jar of pickles)
- 1 cup seasoned breadcrum extractbs
- 1/2 cup grated Parmesan cheese
- 1/2 cup all-purpose flour
- 2 large eggs, whisked
- 1 tsp garlic powder
- 1 tsp onion powder
- 1/2 tsp paprika
- Salt and pepper, to taste
- Cooking oil, for frying
Preparing the Chicken for Crispiness
Step 1: Marinate the Chicken in Pickle Brine
First, we need to prepare our chicken breasts. For the most tender and flavorful chicken, we’re going to start by giving them a little bath in dill pickle juice. This might sound unusual, but trust me, it’s the secret to incredibly moist and slightly tangy chicken that also helps achieve that perfect crispiness later on. Place the four boneless, skinless chicken breasts into a shallow dish or a large resealable plastic bag. Pour the entire cup of dill pickle juice over the chicken, ensuring all pieces are fully submerged. Seal the bag or cover the dish and refrigerate for at least 30 minutes, or up to 2 hours for a more pronounced flavor. The acidity in the pickle juice tenderizes the meat beautifully and infuses it with a subtle, delicious zest.
Step 2: Set Up the Breading Station
While the chicken is marinating, it’s time to get our breading station ready. This is where the magic happens for that amazing crispy coating. You’ll need three shallow dishes or plates. In the first dish, place the 1/2 cup of all-purpose flour. In the second dish, pour in your two whisked large eggs. In the third and final dish, combine the 1 cup of seasonerum extractreadcrumbs with the 1/2 cup of grated Parmesan cheese. To elevate our breading further, we’ll add our dry seasoningrum extracto this breadcrumb and cheese mixture. Stir in the 1 tsp of garlic powder, 1 tsp of onion powder, and the 1/2 tsp of paprika. Don’t forget to season generously with salt and pepper to your tasrum extract This blend of breadcrumbs, Parmesan, and spices will create a wonderfully savory and crunchy exterior for our chicken.
Breading and Frying for Ultimate Crisp
Step 3: Dredgin extractg the Chicken in Breading
Once the chicken has finished its marinating bath, it’s time to get it coated. Remove each chicken breast from the pickle juice, letting any excess drip off. We don’t want it too wet, as this can make the flour clump. First, place the chicken breast into the dish with the all-purpose flour, ensuring it’s coated evenly on all sides. Gently shake off any excess flour. Next, dip the floured chicken breast into the whisked eggs, allowing the excess egg to drip back into the dish. The egg acts as the arum extractsive for our delicious breadcrumb mixture. Finally, transfer the egg-coated chicken breast to the trum extractd dish containing the seasoned brum extractdcrumb and Parmesan mixture. Press the breadcrumbs firmly onto the chicken, ensuring a complete and even coating. Repeat this process for all four chicken breasts. For an extra crispy crust, you can double-dip the chicken – once in the flour andrum extractg, then back into the egg and finally into the breadcrumb mixture again.
Step 4: Frying the Chicken to Golden Perfection
Now for the exciting part: frying! Heat about 1 to 1.5 inches of cooking oil in a large, heavy-bottomed skillet or Dutch oven over medium-high heat. You want the oil to rum extracthot enough to sizzle immediately when a small piece of breadcrumb is dropped in, but not so hot that it starts to smoke. A good temperature is around 350°F (175°C). Carefully place 2 chicken breasts into the hot oil, ensuring not to overcrowd the pan. Overcrowding will lower the oil temperature and result in soggy chicken. Fry the chicken for about 5-7 minutes per side, or until it’s golden brown, crispy, and cooked through. The internal temperature should reach 165°F (74°C). Use tongs to carefully flip the chicken, ensuring even cooking and browning.
Finishing Touches and Resting
Step 5: Draining and Resting for Maximum Crunch
Once the chicken is beautifully golden brown and cooked through, carefully remove it from the hot oil using tongs. Place the fried chicken breasts onto a wire rack set over a baking sheet. This is a crucial step for maintaining crispiness. Allowing the chicken to drain on a wire rack, rather than paper towels, allows air to circulate around all sides of the chicken, preventing the bottom from becoming soggy. Let the chicken rest on the wire rack for at least 5-10 minutes before serving. This resting period allows the juices to redistribute throughout the meat, resulting in a more tender and moist chicken, while the exterior remains wonderfully crisp. If you’re frying a second batch, ensure your oil comes back up to temperature before adding the remaining chicken. You can keep the first batch warm in a low oven (around 200°F/95°C) while you fry the rest.
Conclusion:
There you have it – your guide to creating The Best Crispy Dill Pickle Parmesan Chicken: An Amazing Ultimate Recipe! We’ve walked through each step to ensure you achieve that irresistible crunch and savory, tangy flavor profile that makes this dish so special. This recipe is perfect for a weeknight dinner that feels gourmet, or for impressing guests at your next gathering. Serve it alongside a fresh garden salad with a light vinaigrette, or with a side of creamy mashed potatoes and steamed green beans for a truly comforting meal. Don’t be afraid to experiment! You can adjust the amount of dill, swap out the Parmesan for Pecorino Romano, or even add a pinch of cayenne pepper for a hint of heat. The key is to have fun and make it your own. We’re confident that once you try this The Best Crispy Dill Pickle Parmesan Chicken: An Amazing Ultimate Recipe, it will become a staple in your culinary repertoire. Happy cooking!
Frequently Asked Questions:
Can I make The Best Crispy Dill Pickle Parmesan Chicken ahead of time?
While it’s best enjoyed fresh for maximum crispiness, you can prepare the chicken coating and the Parmesan mixture in advance. Store them separately in airtight containers. For the best results, coat and cook the chicken just before serving.
What can I serve with The Best Crispy Dill Pickle Parmesan Chicken if I don’t want a salad or mashed potatoes?
Absolutely! This versatile chicken pairs wonderfully with roasted root vegetables, a simple pasta with garlic and olive oil, or even served in a bun as a delicious sandwich. The tangy pickle flavor also complements slaw very well.
Crispy Dill Pickle Parmesan Chicken-Ultimate Recipe
An ultimate recipe for incredibly moist, tangy, and crispy dill pickle parmesan chicken breasts, coated in a savory breadcrumb and cheese mixture and fried to golden perfection.
Ingredients
-
4 boneless, skinless chicken breasts
-
1 cup dill pickle juice (from a jar of pickles)
-
1 cup seasoned breadcrumbs
-
1/2 cup grated Parmesan cheese
-
1/2 cup all-purpose flour
-
2 large eggs, whisked
-
1 tsp garlic powder
-
1 tsp onion powder
-
1/2 tsp paprika
-
Salt and pepper, to taste
-
Cooking oil, for frying
Instructions
-
Step 1
Marinate the chicken breasts in dill pickle juice for at least 30 minutes, or up to 2 hours, ensuring all pieces are fully submerged. This tenderizes the meat and infuses it with flavor. -
Step 2
Set up the breading station: one dish with all-purpose flour, a second with whisked eggs, and a third with seasoned breadcrumbs, grated Parmesan cheese, garlic powder, onion powder, paprika, salt, and pepper, mixed well. -
Step 3
Dredge each chicken breast first in flour, then dip in the whisked eggs, letting excess drip off. Finally, coat thoroughly with the breadcrumb and Parmesan mixture, pressing firmly. -
Step 4
Heat 1 to 1.5 inches of cooking oil in a large skillet over medium-high heat until it reaches approximately 350°F (175°C). Carefully place 2 chicken breasts into the hot oil, avoiding overcrowding. -
Step 5
Fry the chicken for 5-7 minutes per side, or until golden brown, crispy, and cooked through (internal temperature of 165°F/74°C). Flip carefully with tongs for even cooking. -
Step 6
Remove the fried chicken from the oil and place on a wire rack set over a baking sheet to drain and maintain maximum crunch. Let rest for 5-10 minutes before serving.
Important Information
Nutrition Facts (Per Serving)
It is important to consider this information as approximate and not to use it as definitive health advice.
Allergy Information
Please check ingredients for potential allergens and consult a health professional if in doubt.