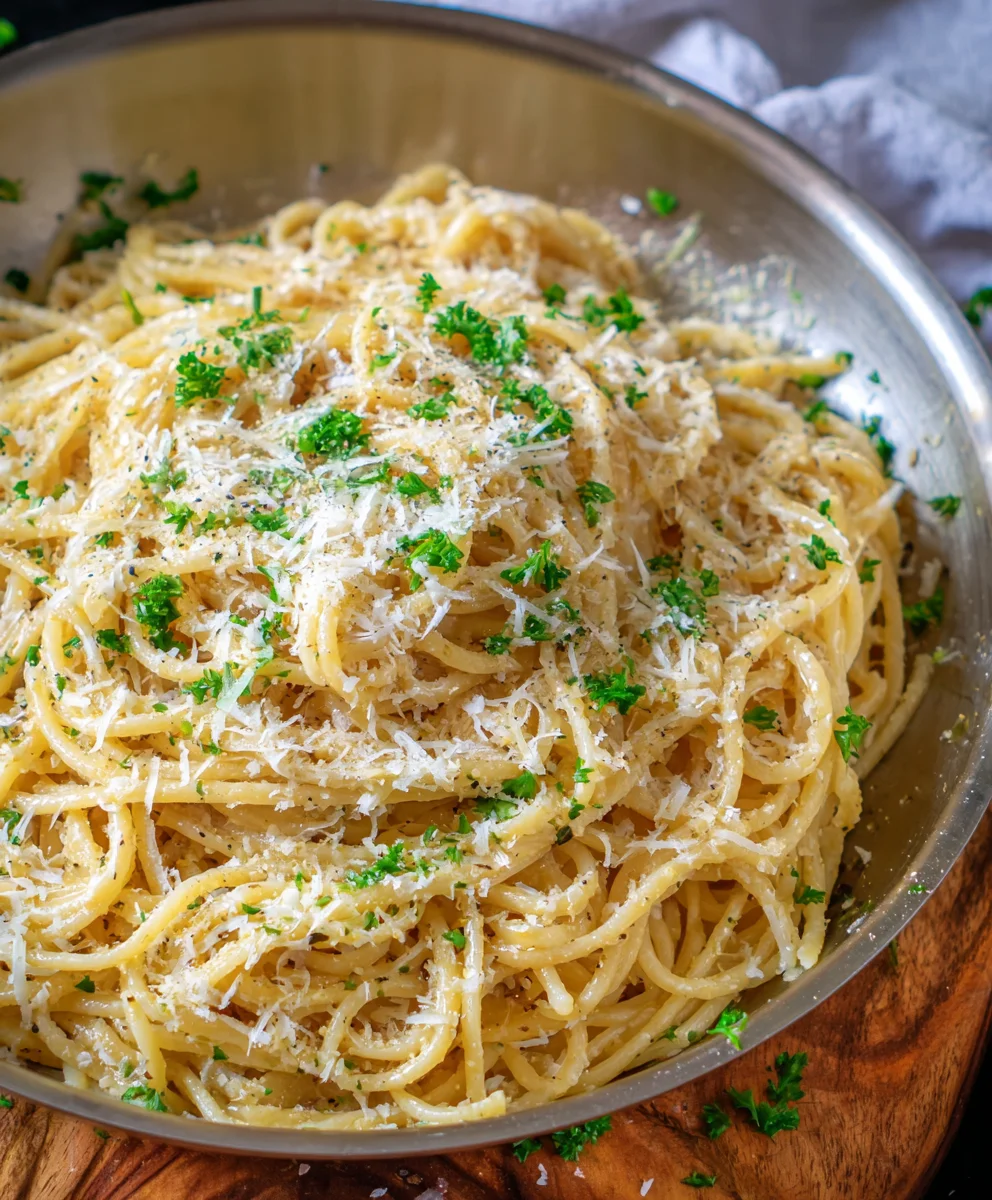
Easy Garlic Parmesan Pasta Recipe- Quick & Flavorful
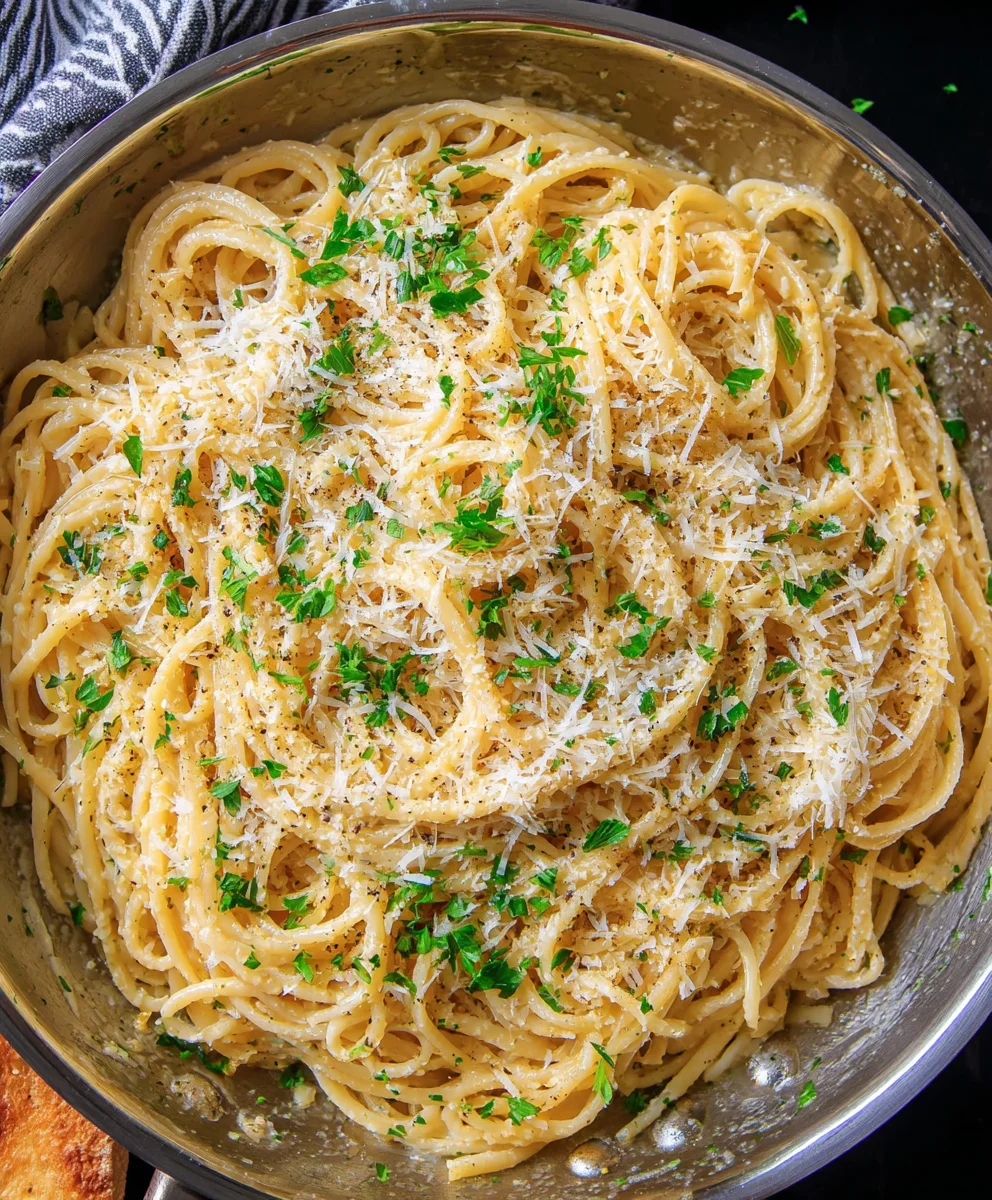
Garlic Parmesan Pasta is more than just a meal; it’s a comforting hug in a bowl, a symphony of simple yet profound flavors that instantly transport me back to cozy evenings and shared laughter. There’s an undeniable magic in how humble ingredients like pasta, garlic, and Parmesan cheese can conon-alcoholic alesce into something so utterly delicious. It’s the kind of dish that appeals to everyone, from picky eaters to seasoned foodies, making it a reliable star for weeknight dinners or casual gatherings. What truly sets this Garlic Parmesan Pasta apart is its effortless elegance; it’s incredibly easy to whip up, yet tastes like it’s been simmered for hours in a gourmet kitchen. The creamy, garlicky sauce clings perfectly to each strand of pasta, punctuated by the salty, nutty notes of the Parmesan. It’s a recipe I return to again and again, a testament to the power of perfectly balanced, crowd-pleasing flavors.
Ingredients:
- 1 cup grated Parmesan cheese
- 3 tablespoons butter
- 4 teaspoons minced garlic (approximately 4 cloves)
- 2 cups chicken broth
- 1 cup milk (whole milk provides the richest flavor and texture)
- 8 ounces angel hair pasta
- 1 teaspoon salt
- 1 teaspoon black pepper
- 1/2 teaspoon Italian seasoning (optional, but highly recommended for an extra layer of flavor)
Cooking Phase 1: Preparing the Pasta Base
Step 1: Toasting the Garlic
Begin extract by melting the butter in a large skillet or pot over medium heat. Once the butter is fully meltegin extractnd begins to lightly foam, add your minced garlic. It’s crucial here to cook the garlic gently. We’re not aiming to brown or burn it, which can make it bitter. Instead, we want to toast it lightly, releasing its aromatic oils and infusing the butter with a wonderful fragrance. This should take about 1 to 2 minutes. Swirl the skillet occasionally to ensure even toasting. The garlic should become fragrant and just slightly golden, but not brown. This gentle toasting is a key step to unlocking the best garlic flavor for our dish.
Step 2: Building the Sauce Foundation
Once the garlic is beautifully fragrant, it’s time to build the creamy sauce base. Pour in the chicken broth and milk to the skillet with the garlic and butter. Stir everything together well. Bring this liquid mixture to a gentle simmer over medium heat. Don’t let it come to a rolling boil; a gentle simmer is perfect for allowing the flavors to meld without causing the milk to curdle. This simmering process will also help to slightly reduce the liquid, concentrating its flavor.
Step 3: Cooking the Angel Hair Pasta
Now, let’s introduce the angel hair pasta to our simmering liquid. Carefully add the 8 ounces of angel hair pasta directly into the skillet. Angel hair pasta cooks very quickly, so it’s important to stir it frequently to prevent it from sticking together or to the bottom of the pan. Push the pasta down into the liquid as much as possible. We want the pasta to absorb some of that delicious broth and milk mixture as it cooks. Continue to simmer, stirring often, for approximately 3-5 minutes, or until the pasta is al dente. This means it should be tender but still have a slight bite to it. Overcooked angel hair can become mushy, so keep a close eye on it.
Cooking Phase 2: Enriching the Flavor
Step 4: Incorporating the Cheese and Seasonings
As soon as the pasta is cooked to your liking, it’s time to add the cheese and seasonings. Reduce the heat to low. Sprinkle in the 1 cup of grated Parmesan cheese. Stir continuously until the cheese has melted and is fully incorporated into the sauce, creating a rich and creamy consistency. This is where the magic happens, transforming the broth and milk into a luscious coating for the pasta. Now, add the salt, black pepper, and the optional Italian seasoning. Stir these in thoroughly to distribute the flavors evenly throughout the dish. Taste and adjust seasonings if needed; you might want a touch more salt or pepper depending on your preference. The Italian seasoning adds a lovely herbaceous note that complements the garlic and Parmesan beautifully.
Step 5: Achieving the Perfect Creamy Texture
Continue to cook over low heat, stirring constantly, for another 1-2 minutes. This final stir allows the sauce to thicken slightly and cling to the angel hair pasta. The starch released from the pasta during cooking will help to naturally thicken the sauce, along with the emulsified butter and cheese. The goal is a wonderfully creamy, well-coated pasta dish, not a watery one. If the sauce seems a little too thick, you can add a tablespoon or two of milk or chicken broth to loosen it up. Conversely, if it’s too thin, continue stirring gently over low heat for another minute or so, and the Parmesan cheese will continue to thicken it. Once you achieve that desirable creamy texture, your Garlic Parmesan Pasta is ready to be served.
Conclusion:
And there you have it – a simple yet incredibly satisfying Garlic Parmesan Pasta that’s perfect for any night of the week! We’ve walked through how to create this wonderfully creamy and flavorful dish, showcasing how basic pantry staples can transform into something truly special. The beauty of this Garlic Parmesan Pasta lies not only in its deliciousness but also in its versatility. Don’t hesitate to experiment and make it your own!
For serving, consider pairing it with a crisp green salad, some crusty garlic bread for extra indulgence, or even some grilled chicken or shrimp for a more substantial meal. When it comes to variations, the possibilities are endless! Add in sautéed mushrooms, sun-dried tomatoes, or a pinch of red pepper flakes for a touch of heat. You could also try different pasta shapes – fettuccine, linguine, or even penne work wonderfully.
I encourage you to give this Garlic Parmesan Pasta a try. It’s a testament to how delicious home-cooked meals can be, even with minimal effort. I’m confident you’ll find it to be a new family favorite. Happy cooking!
Frequently Asked Questions:
Can I make this Garlic Parmesan Pasta ahead of time?
While it’s best enjoyed fresh, you can prepare the sauce components ahead of time. Cook the pasta just before serving and toss with the warm sauce. The sauce itself can be gently reheated on the stovetop over low heat, adding a splash of pasta water or milk if it becomes too thick.
What kind of cheese is best for Garlic Parmesan Pasta?
Freshly grated Parmesan cheese will give you the best flavor and meltability. While pre-grated Parmesan can be used in a pinch, it often contains anti-caking agents that can affect the sauce’s texture. A good quality Parmigiano-Reggiano is highly recommended for authentic flavor.
Easy Garlic Parmesan Pasta Recipe- Quick & Flavorful
A quick and flavorful pasta dish featuring garlic, Parmesan cheese, and a creamy sauce, perfect for a weeknight meal.
Ingredients
-
1 cup grated Parmesan cheese
-
3 tablespoons butter
-
4 teaspoons minced garlic
-
2 cups chicken broth
-
1 cup milk
-
8 ounces angel hair pasta
-
1 teaspoon salt
-
1 teaspoon black pepper
-
1/2 teaspoon Italian seasoning
Instructions
-
Step 1
Melt the butter in a large skillet or pot over medium heat. Add minced garlic and toast gently for 1-2 minutes until fragrant and slightly golden, being careful not to burn it. -
Step 2
Pour in the chicken broth and milk. Stir well and bring the mixture to a gentle simmer over medium heat. Avoid a rolling boil to prevent curdling. -
Step 3
Add the angel hair pasta to the simmering liquid. Stir frequently for 3-5 minutes, or until al dente, allowing the pasta to absorb the liquid. -
Step 4
Reduce heat to low. Sprinkle in the grated Parmesan cheese and stir until melted and incorporated into a creamy sauce. Add salt, black pepper, and optional Italian seasoning, stirring thoroughly. -
Step 5
Continue to cook over low heat, stirring constantly for another 1-2 minutes, allowing the sauce to thicken and coat the pasta. Adjust consistency with milk or broth if needed. Serve immediately.
Important Information
Nutrition Facts (Per Serving)
It is important to consider this information as approximate and not to use it as definitive health advice.
Allergy Information
Please check ingredients for potential allergens and consult a health professional if in doubt.